 |
| Before: Dreidel |
Happy Chanukah!
Materials
Dreidels
16-gauge copper wire
Tools
Size 52 drill bit
Flex shaft
14-gauge cup burr
Needle files
 |
| Order the dreidels |
Select the dreidels and arrange them in the order you like. We used seven dreidels but the number you need will depend on the size of the dreidels. The size links you make and the length you need for your bracelet.
Wash the dreidels with soap and water. Some of our dreidels had smudges of chocolate on them since some of the game players ate their loot.
 |
| Mark the dreiel |
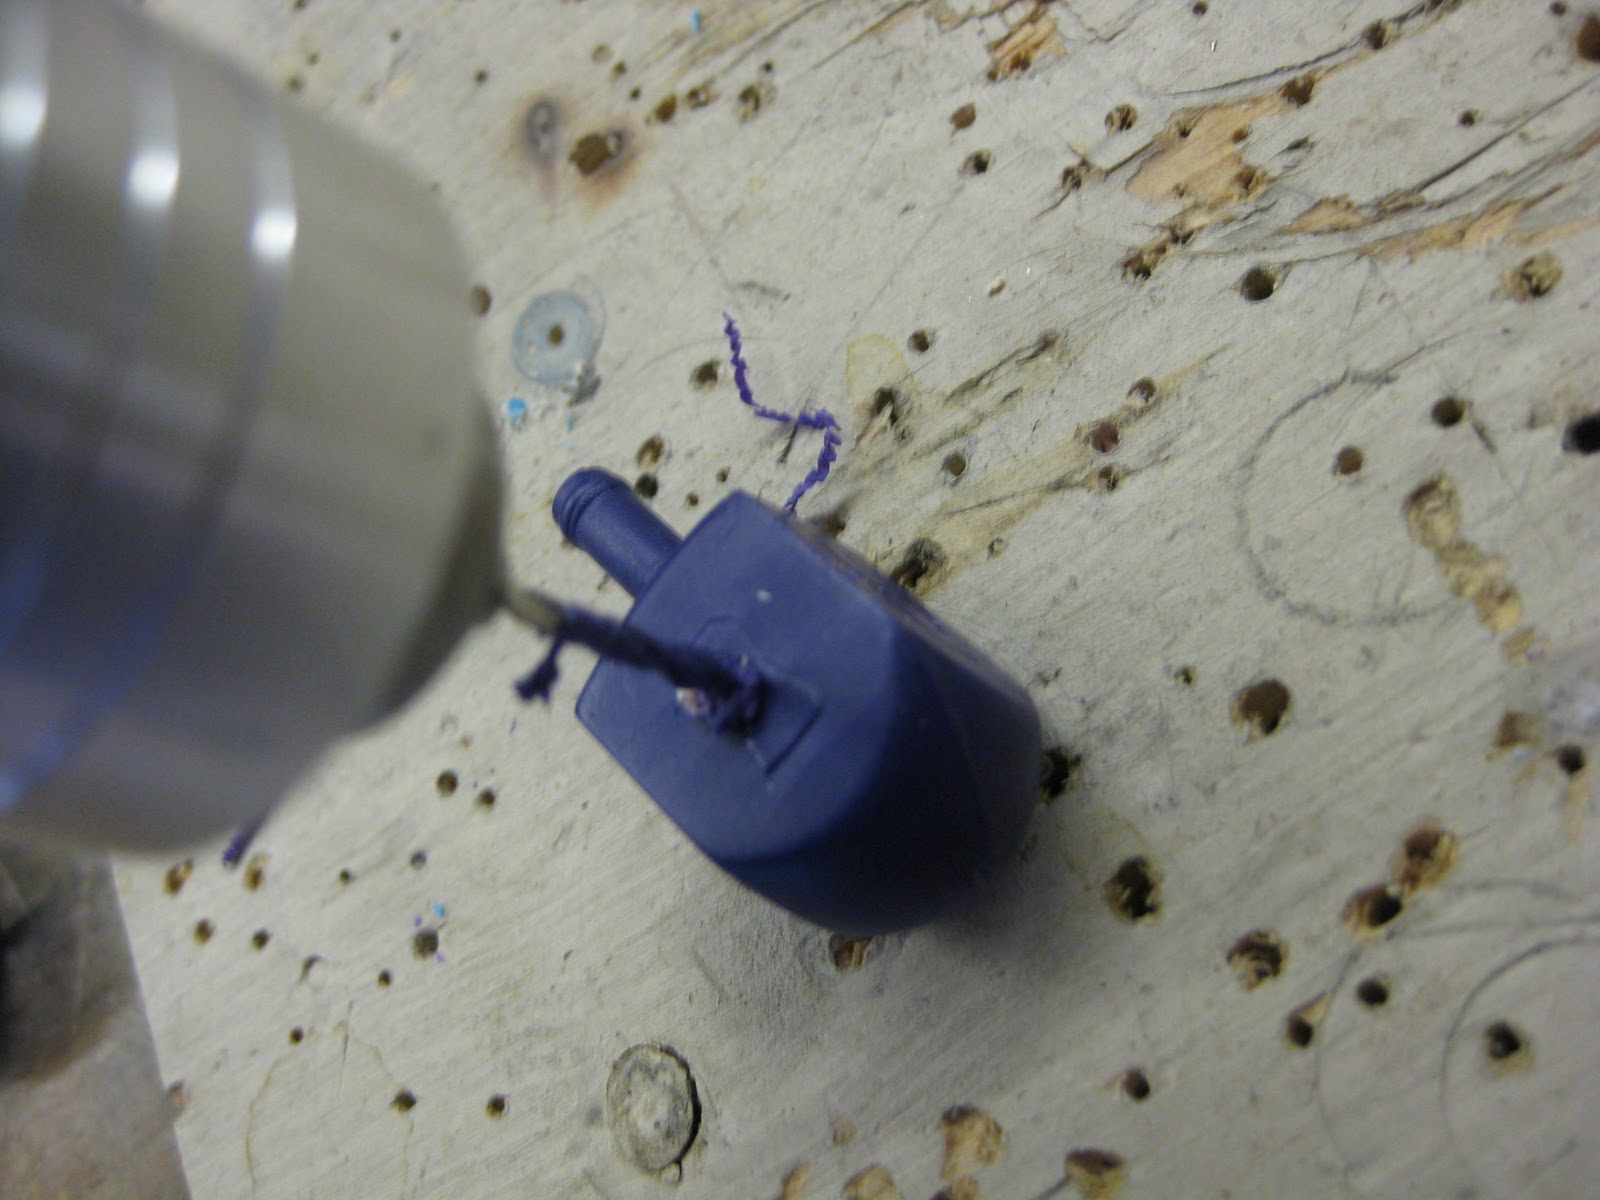 |
| Drill the dreidel |
Step 3

 Feed the wire through the dreidel. Use pliers to create a medium sized loop on either side of the dreidel.
Step 4

Step 5
Make the hook and eye clasp. Make a few chains of links to create several eyes so the bracelet is adjustable.
 |
| After: Dreidel Bracelet by GeltDesigns.com |
Attach the hook and eyes of the clasp to the bracelet.
Related Tutorials
Make Chanukah Menorah Earrings from Plastic Bottle Caps
Make a Dreidel Pendant
Make Dreidel Earrings
Further Reading
"500 Judaica: Innovative Contemporary Ritual Art (500 Series)
"500 Bracelets: An Inspiring Collection of Extraordinary Designs (500 Series)
Jewelry from Found Objects. $ spent to date: 0
Found materials: dreidels, sivivon
New Jewelry a Day.


